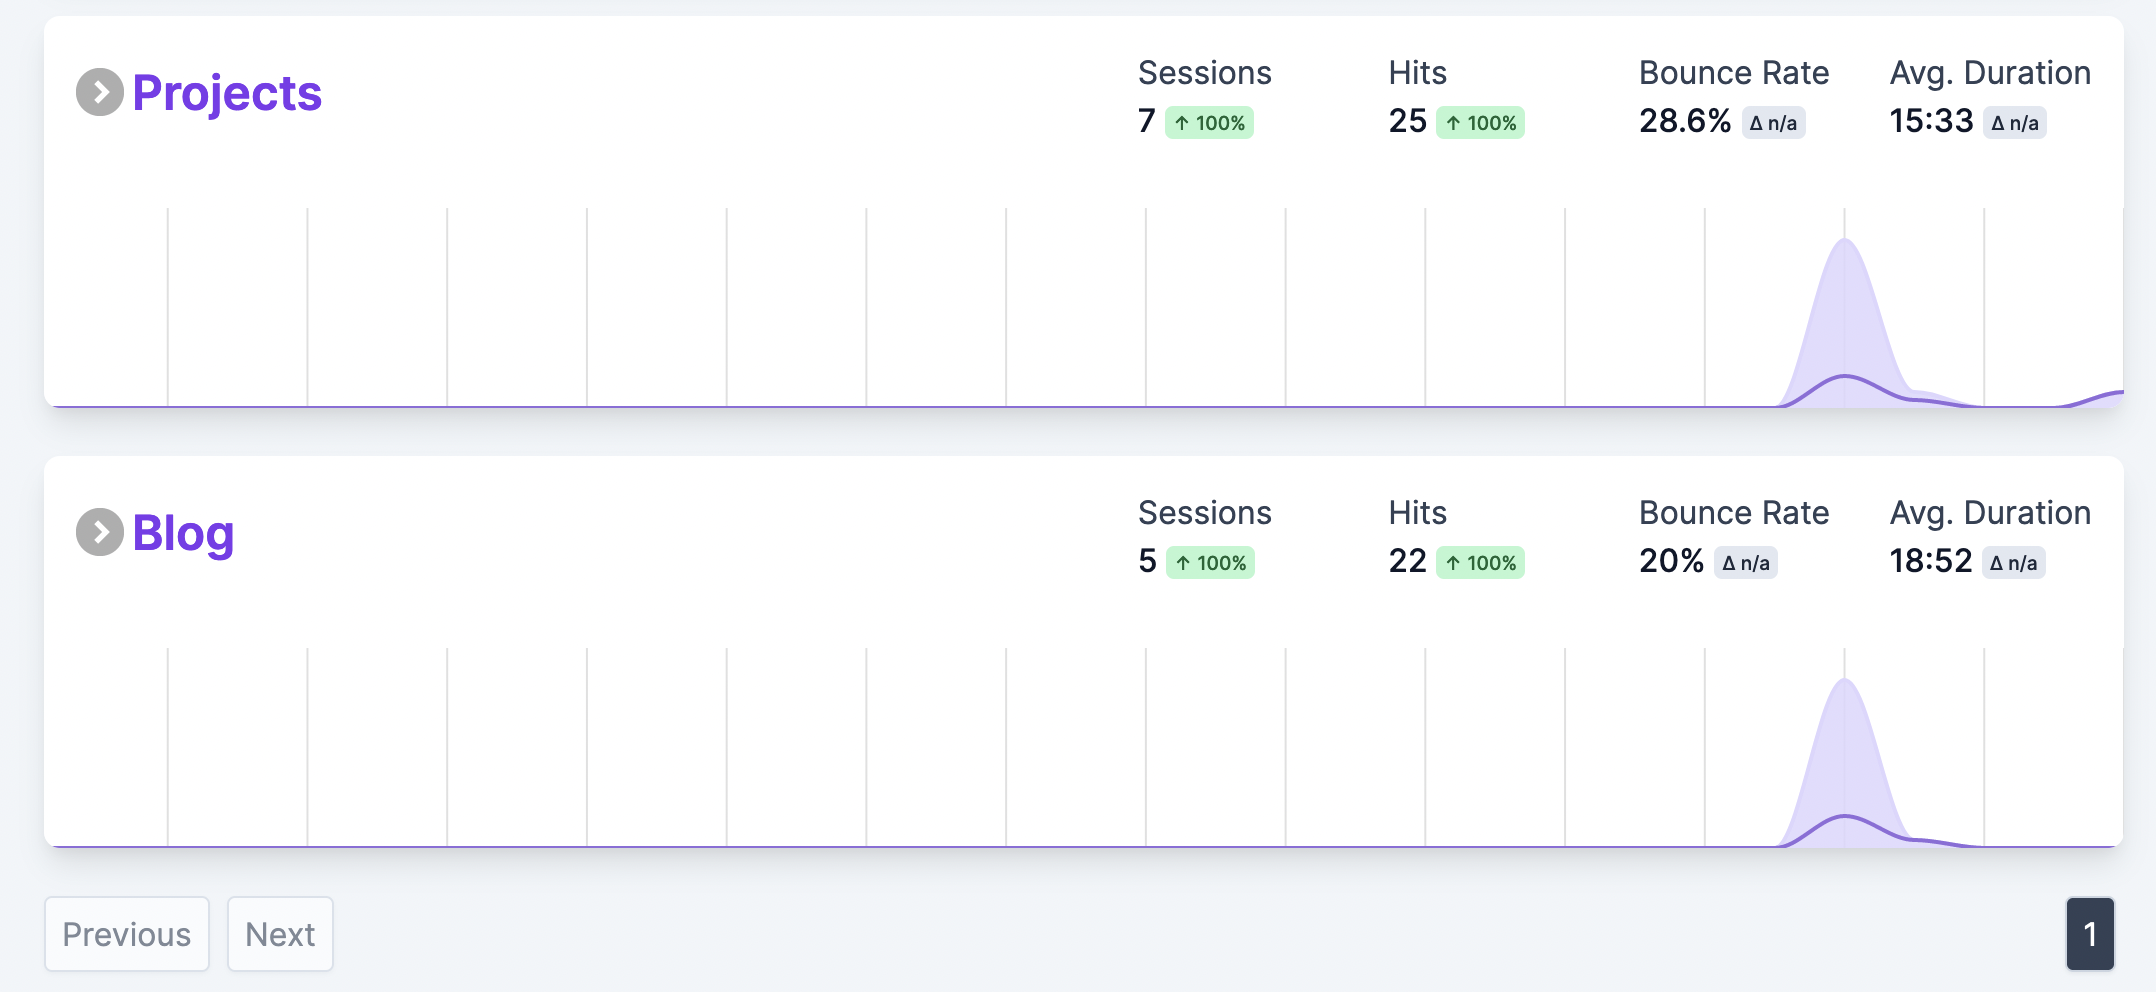
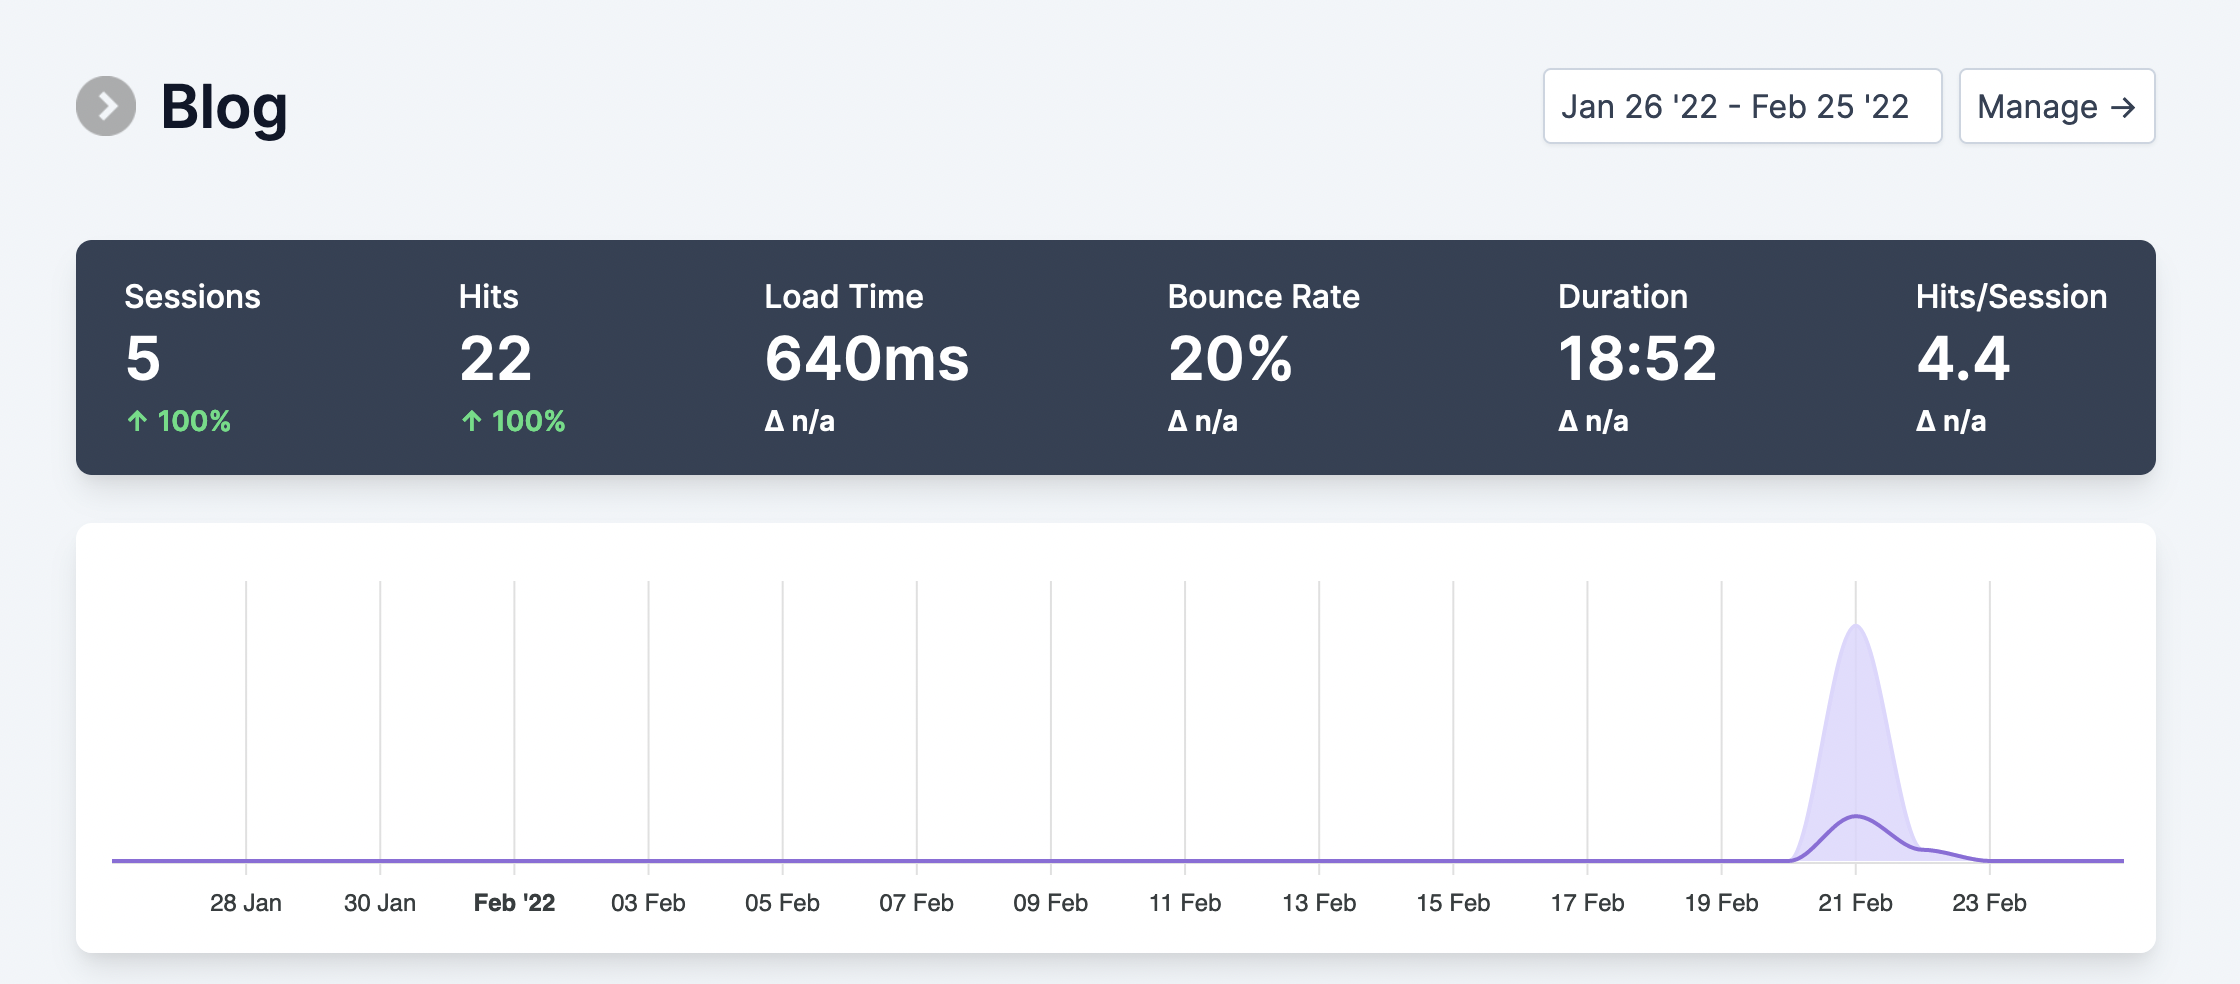
I recently set up analytics on this website and for my projects ( [[Projects]]B ). I opted to use Shynet, a free and open source analytics platform, and Caddy, a modern web server written in Go that automatically handles HTTPS. Here’s what the end result looks like:

A lot of helpful information relevant to this blog post came from this blog post: https://blog.xga.ie/shynet.
Summary
I have a few different domains/subdomains that I use to host different things:
- ollybritton.com; a small site describing myself and linking to other sites
- brain.ollybritton.com; the site you’re on right now, half blog and half place to make my notes public
- projects.ollybritton.com; domain to host projects I’ve worked on in the past
These translate to different Shynet “services”, which keeps the analytics separate.

For each service, Shynet gives you a code snippet that looks like this:
<noscript>
    <img src="https://analytics.ollybritton.com/ingress/569cf9fe-4c3f-4b15-a12b-a55a50493bc1/pixel.gif">
</noscript>
<script defer src="https://analytics.ollybritton.com/ingress/569cf9fe-4c3f-4b15-a12b-a55a50493bc1/script.js"></script>
The idea is that you can add this to all websites relevant to that service, and analytics will be collected automatically. However, it would be a pain to manually add snippets like this to every web page. To make things easier, Caddy has a replace-response module that lets you dynamically manipulate sections of the content you’re serving, kind of like the ngx_http_sub_module if you’re using Nginx or mod_substitute if you’re using Apache. By identifying any requests that contain a <head> tag, Caddy can insert the analytics snippet into the response (with some limitations).
The Caddy config that does this roughly boils down to:
# Snippet for inserting analytics
# Use like:
# import analytics "<UUID>"
(analytics) {
        replace @notjs {
                `<head>` `<head><noscript><img src="https://analytics.ollybritton.com/ingress/{args.0}/pixel.gif"></noscript><script defer src="https://analytics.ollybritton.com/ingress/{args.0}/script.js"></script>`
        }

        @notjs {
                not path_regexp notjs \.js$
        }
}
Setup
Installing Caddy with Extra Modules using xcaddy
If you’ve already installed Caddy, you might need to install it again. Using replace-response involves compiling Caddy with an additional module – something like a plugin for Caddy that gives it extra features. The replace-response module is still written by the Caddy team, but just isn’t included in the standard distribution that comes installed with your package manager.
Therefore, it’s necessary to compile Caddy from scratch. Since Caddy is written in Go, you will need to have Go installed. Instructions for doing this can be found on the Go’s Download and Install page. Make sure you follow the instructions to add the Go bin to the path by adding the following to your .zshrc or .bashrc:
export PATH=$PATH:$(go env GOPATH)/bin # Add go bin to the path so programs installed by go can be accessed like normal programs.
Then you’ll need to install xcaddy, a tool written by the Caddy team for compiling Caddy with additional modules. To do this, you should be able to run:
go install github.com/caddyserver/xcaddy/cmd/xcaddy@latest
You will also need to clone the caddy repository so that the source code is available to build. This can be done using
git clone https://github.com/caddyserver/caddy.git
You can now check if it’s installed properly entering the caddy repository (e.g. by using cd caddy if you just cloned it with Git) and running:
xcaddy version
If you get some nice output, it’s installed and working. If it still doesn’t work, I’d suggest trying to identify whether it’s go, caddy or xcaddy not working properly and consulting the corresponding documentation.
To actually build caddy with the replace-response module, you can run:
xcaddy build --with github.com/caddyserver/replace-response
This should split out a new binary file in the current directory just called caddy.
If you’re replacing an existing installation of caddy, you now need to swap over the two programs. You can do this like so:
cd ~ # Go back to the home directory
where caddy # Look up where Caddy currently is
Note down what the output of the command is, e.g. /usr/bin/caddy. Now move it with
sudo mv /usr/bin/caddy /usr/bin/bkp.caddy # Rename the existing Caddy installation to a backup
cd (where the caddy repository is) # Go back to the caddy repository that you just built the file into
sudo mv ./caddy /usr/bin/caddy
You should now be able to use the caddy command again. It might be necessary to restart the caddy service. You can do this with
caddy stop
caddy start
As one final check, you can verify that the replace-response module is now properly installed:
caddy list-modules | grep replace-reponse # Should output something like "http.handlers.replace_response"
If any of this doesn’t work, here’s some relevant documentation:
Installing Shynet
I chose to install Shynet using a Docker container, which meant I didn’t have to worry about setting up a Postgres database. They provide the instructions for using a docker container or not using a docker container in their GUIDE.md file:
In the process of installing with Docker compose, you end up creating three files: docker-compose.yml, nginx.conf and .env. Nginx is used by the Docker container only and doesn’t interfere with Caddy. I’d recommend following the above tutorial, but here’s what my three files ended up looking like (comments starting with ADDED are mine):
docker-compose.yml
version: '3'
services:
  shynet:
    container_name: shynet_main
    image: milesmcc/shynet:latest
    restart: unless-stopped
    expose:
      - 8080
      # ADDED: You don't change this port to end up running the actual program on a different port, this is just the port used internally by the Docker container. You set the actual port down below.
    env_file:
      # Create a file called '.env' if it doesn't already exist.
      # You can use `TEMPLATE.env` as a guide.
      - .env
    environment:
      - DB_HOST=db
    networks:
      - internal
    depends_on:
      - db
  db:
    container_name: shynet_database
    image: postgres
    restart: always
    environment:
      - "POSTGRES_USER=${DB_USER}"
      - "POSTGRES_PASSWORD=${DB_PASSWORD}"
      - "POSTGRES_DB=${DB_NAME}"
    volumes:
      - shynet_db:/var/lib/postgresql/data
    networks:
      - internal
  webserver:
    container_name: shynet_webserver
    image: nginx
    restart: always
    volumes:
      - ./nginx.conf:/etc/nginx/conf.d/default.conf
    ports:
      - 7777:80 # ADDED: Change 7777 here if you want a different port
    depends_on:
      - shynet
    networks:
      - internal

volumes:
  shynet_db:
networks:
  internal:
.env
# This file shows all of the environment variables you can
# set to configure Shynet, as well as information about their
# effects. Make a copy of this file to configure your deployment.

# Database settings (PostgreSQL)
DB_NAME=shynet_db
DB_USER=shynet_db_user
DB_PASSWORD=change-me-to-your-password
DB_HOST=db
DB_PORT=5432

# Email settings (optional)
EMAIL_HOST_USER=example
EMAIL_HOST_PASSWORD=example_password
EMAIL_HOST=smtp.example.com
EMAIL_PORT=465
EMAIL_USE_SSL=True
# Comment out EMAIL_USE_SSL & uncomment EMAIL_USE_TLS if your SMTP server uses TLS.
# EMAIL_USE_TLS=True
SERVER_EMAIL=Shynet <noreply@shynet.example.com>

# General Django settings
DJANGO_SECRET_KEY=change-me-to-your-password

# For better security, set this to your deployment's domain. Comma separated.
ALLOWED_HOSTS=your-hostname.com # ADDED: Your hostname. I ended ups setting mine to analytics.ollybritton.com

# Set to True (capitalized) if you want people to be able to sign up for your Shynet instance (not recommended)
ACCOUNT_SIGNUPS_ENABLED=False

# Should user email addresses be verified? Only set this to `required` if you've setup the email settings and allow
# public sign-ups; otherwise, it's unnecessary.
ACCOUNT_EMAIL_VERIFICATION=none

# The timezone of the admin panel. Affects how dates are displayed.
# This must match a value from the IANA's tz database.
# Wikipedia has a list of valid strings: https://en.wikipedia.org/wiki/List_of_tz_database_time_zones
TIME_ZONE=Europe/London

# Set to "False" if you will not be serving content over HTTPS
SCRIPT_USE_HTTPS=True

# How frequently should the monitoring script "phone home" (in ms)?
SCRIPT_HEARTBEAT_FREQUENCY=5000

# How much time can elapse between requests from the same user before a new
# session is created, in seconds?
SESSION_MEMORY_TIMEOUT=1800

# Should only superusers (admins) be able to create services? This is helpful
# when you'd like to invite others to your Shynet instance but don't want
# them to be able to create services of their own.
ONLY_SUPERUSERS_CREATE=True

# Whether to perform checks and setup at startup, including applying unapplied
# migrations. For most setups, the recommended value is True. Defaults to True.
# Will skip only if value is False.
PERFORM_CHECKS_AND_SETUP=True

# The port that Shynet should bind to. Don't set this if you're deploying on Heroku.
PORT=7777 # ADDED: This should be the same port as the one at the bottom of the docker-compose file

# Set to "False" if you do not want the version to be displayed on the frontend.
SHOW_SHYNET_VERSION=True

# Redis, queue, and parellization settings; not necessary for single-instance deployments.
# Don't uncomment these unless you know what you are doing!
# NUM_WORKERS=1
# Make sure you set a REDIS_CACHE_LOCATION if you have more than one frontend worker/instance.
# REDIS_CACHE_LOCATION=redis://redis.default.svc.cluster.local/0
# If CELERY_BROKER_URL is set, make sure CELERY_TASK_ALWAYS_EAGER is False and
# that you have a separate queue consumer running somewhere via `celeryworker.sh`.
# CELERY_TASK_ALWAYS_EAGER=False
# CELERY_BROKER_URL=redis://redis.default.svc.cluster.local/1

# Should Shynet show third-party icons in the dashboard?
SHOW_THIRD_PARTY_ICONS=True

# Should Shynet block collection of IP addresses globally?
BLOCK_ALL_IPS=False

# Should Shynet include the date and site ID when hashing users?
# This will prevent any possibility of cross-site tracking provided
# that IP collection is also disabled, and external keys (primary
# keys) aren't supplied. It will also prevent sessions from spanning
# one day to another.
AGGRESSIVE_HASH_SALTING=True

# Custom location url to link to in frontend.
# $LATITUDE will get replaced by the latitude, $LONGITUDE will get
# replaced by the longitude.
# Examples:
#  - https://www.openstreetmap.org/?mlat=$LATITUDE&mlon=$LONGITUDE (default)
#  - https://www.google.com/maps/search/?api=1&query=$LATITUDE,$LONGITUDE
#  - https://www.mapquest.com/near-$LATITUDE,$LONGITUDE
LOCATION_URL=https://www.openstreetmap.org/?mlat=$LATITUDE&mlon=$LONGITUDE

# How many services should be displayed on dashboard page?
# Set to big number if you don't want pagination at all.
DASHBOARD_PAGE_SIZE=5

# Should background bars be scaled to full width?
USE_RELATIVE_MAX_IN_BAR_VISUALIZATION=True
nginx.conf
server {
    server_name YOUR-HOSTNAME.com # ADDED: Your hostname. I ended up setting mine to analytics.ollybritton.com
    access_log /var/log/nginx/bin.access.log;
    error_log /var/log/nginx/bin.error.log error;


    location / {
        proxy_pass http://shynet:7777; # ADDED: You should also change this port if you've changed it above.
        proxy_redirect off;
        proxy_set_header Host $http_host;
        proxy_set_header X-Real-IP $remote_addr;
        proxy_set_header X-Forwarded-For $proxy_add_x_forwarded_for;
        proxy_set_header X-Forwarded-Proto $scheme;
        proxy_set_header X-Forwarded-Protocol $scheme;
        proxy_set_header X-Url-Scheme $scheme;
    }
    listen 80;
}
Tying everything together
If running with docker-compose, you should now be able to do
sudo docker-compose up -d # Start Shynet on port 7777 (or whatever you changed it to)
It is then a case of adding the endpoint you want to want to serve the analytics dashboard at to your Caddyfile. If you don’t have one setup yet, you may wish to read the getting started page for caddy.
In my case, I want to proxy requests to analytics.ollybritton.com to localhost:7777 on the VPS I’m running this on. To do this, I used:
# -- Analytics --
# Serve ShyNet analytics dashboard at analytics.ollybritton.com
analytics.ollybritton.com {
        reverse_proxy http://localhost:7777
}
If you haven’t done so already, you should add an A record on your DNS that points this subdomain to the IP address of you machine. If everything is working, you should now be able to be able to log in with the email address you created while following the instructions in Shynet’s GUIDE.md file. To actually create a service, hit the “+ New Service” button on the top-right. Once you’ve filled in the details, you should get the snippet similar to the one mentioned at the very start:
<noscript>
    <img src="https://analytics.ollybritton.com/ingress/569cf9fe-4c3f-4b15-a12b-a55a50493bc1/pixel.gif">
</noscript>
<script defer src="https://analytics.ollybritton.com/ingress/569cf9fe-4c3f-4b15-a12b-a55a50493bc1/script.js"></script>
Adding this snippet to any webpage will start collecting analytics for that service you just made.
Finding and replacing
To insert this snippet automatically, you can use the following Caddyfile code assuming that the installation with xcaddy worked:
# Snippet for inserting analytics
# Use like:
# import analytics "<UUID>"
# Where UUID is the part of the URL after "ingress" in the snippet for that service.
(analytics) {
        replace @notjs {
                `<head>` `<head><noscript><img src="https://YOUR-DOMAIN.com/ingress/{args.0}/pixel.gif"></noscript><script defer src="https://YOUR-DOMAIN.com/ingress/{args.0}/script.js"></script>`
        }

        # Was running into some issues with analytics pages running p5.js
        # Some javascript libraries contain "<head>" in the source which meant they were being replaced.
        # This rule prevents that from happening.
        @notjs {
                not path_regexp notjs \.js$
        }
}
You will also need to add an order option in the global options of your Caddyfile, which is an unnamed block at the very top.
# -- Global options (at very top of file) --
{
        # Specify order for replacing
        order replace after encode
}
This can then be used in other blocks in your Caddyfile. For example, the following code serves the “brain” section of my website:
# -- Blog/Brain --
brain.ollybritton.com {
        import analytics "569cf9fe-4c3f-4b15-a12b-a55a50493bc1"

        root * /home/olly/web/brain.ollybritton.com
        file_server browse

        handle_errors {
                redir https://brain.ollybritton.com/404.html
        }
}
By making a snippet like this, it makes it easy to quickly add analytics for different services. To test this out, restart caddy with:
caddy reload
Issues with gzipped responses
One limitation of the replace-response module is that it doesn’t work on compressed responses because otherwise it would have to unzip the file contents and then zip them again so that the browser understood.
This might happen if Caddy is proxying something running locally that is using gzip compression. To get around this, you might have to add the Accept-Encoding: identity which tells the program you’re proxying to serve requests without any compression:
reverse_proxy localhost:8080 {
    header_up Accept-Encoding identity
}
More information is available in the replace-response project’s README.md file.
Issues with finding/replacing
There are some issues with using the find/replace approach to saving yourself the work of manually putting the analytics on every site. The replace-response module doesn’t let you confirm that it’s definitely HTML you’re replacing and not something like a JavaScript library that contains <head> somewhere in it’s source code (e.g. p5.js). For example, I’ve tried to just write <head> in this linked text file, but it gets replaced.
To alleviate some of the damage, the snippet above makes sure that it’s not replacing anything in a JavaScript file. The reason that this can’t work for HTML is that .html is not always in the file extension for a website you’re visiting.
You might be wondering why I can freely write <head> in this document but am suggesting that this always gets replaced no matter its location in the response body. That’s because in my setup, I’ve actually used the closing tag, </ head> (but without the space). Either one will work, but that’s just meant I’ve had to describe this tutorial with <head> instead.
Why Shynet?
I chose Shynet because it seemed easy to install and it respects privacy settings, unlike some analytics platforms (e.g. Google Analytics, which probably knows your blood type). It doesn’t use any tricks like obfuscating the analytics code, it’s actually well commented. It’s also nice to know that the data isn’t being shipped off to another company and lives right there on the server.
Backlinks
Metadata
date: 2022-02-25 20:04
tags:
- '@?public'
- '@?blog'
- '@?safe-to-post-online'
title: Analytics with Caddy and Shynet